diy essentials: crispy refrigerator pickles

There are several ways to make your own pickles; this way uses all cold ingredients, so they take about two days in the fridge to finish up. The result is really crispy pickles with a satisfying tart/sweet taste. So yummy. So, you ready… Let’s get into the kitchen.
prep time
10 Min
cook time
10 Min
method
Stove Top
yield
Several
Ingredients
- PLAN/PURCHASE
- THE BRINE
- 1 cup filtered water
- 1/2 cup apple cider vinegar
- 1 tablespoon salt, kosher variety
- 1 teaspoon dill seed
- 1 teaspoon peppercorns
- 1 teaspoon coconut sugar
- 1 teaspoon mustard seeds
- THE PICKLES
- 1 pound cucumbers, like kirby’s
- 5 - 5 sprigs fresh dill weed
- OPTIONAL ITEMS
- crushed red-pepper flakes
- garlic cloves (to ward away vampires)
- additional sugar, for a sweeter pickle
- a few thin slices of yellow or red onion
How To Make diy essentials: crispy refrigerator pickles
-
 Step 1PREP/PREPARE
 -
Step 2Gather your Ingredients (mise en place).
-
Step 3Add the brine ingredients to a small saucepan, over medium heat.
-
Step 4Allow the mixture to simmer for 10 - 12 minutes.
-
Step 5Chef’s Note: When I am using salt in a recipe, I like the liquid to be warm before adding it. If the liquid is cold, the salt will fall to the bottom of the pan, and over the course of time can cause pitting in the bottom of the pan. If the liquid is warm (or hot), the salt will dissolve… problem solved.
-
Step 6Remove from the heat, allow to cool, and then place in the fridge until cold.
-
Step 7Cut the pickles into the desired shape (slices, wedges, etc.).
-
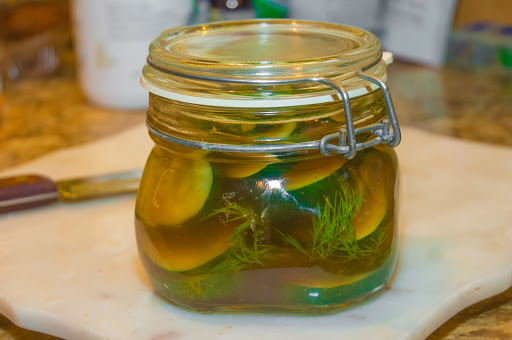
Step 8Add the pickles to a glass jar with a tight-fitting lid, and distribute the dill weed with the pickles.
-
Step 9Strain the cold brining liquid, and pour over the pickles
-
Step 10Seal and place in the fridge for two days before using.
-
Step 11PLATE/PRESENT
-
Step 12Use in any way you would use “store bought” pickles. As a matter of fact, these pickles are great for breading and frying. If you have never taste Southern-fried pickles, you are so missing a great treat. Enjoy.
-
Step 13Keep the faith, and keep cooking.
- Last Step: Don't forget to share! Post a picture of your finished recipe here and on your favorite social network. Don't forget to tag Just A Pinch and include #justapinchrecipes!


Discover More
Category:
Vegetables
Tag:
#Quick & Easy
Tag:
#Healthy
Tag:
#Heirloom
Diet:
Vegetarian
Diet:
Gluten-Free
Diet:
Vegan
Diet:
Low Fat
Diet:
Dairy Free
Diet:
Kosher
Diet:
Low Sodium
Diet:
Wheat Free
Diet:
Soy Free
Diet:
Low Carb
Ingredient:
Vegetable
Culture:
American
Method:
Stove Top
Comment & Reviews
ADVERTISEMENT
Just A Pinch Sweepstakes