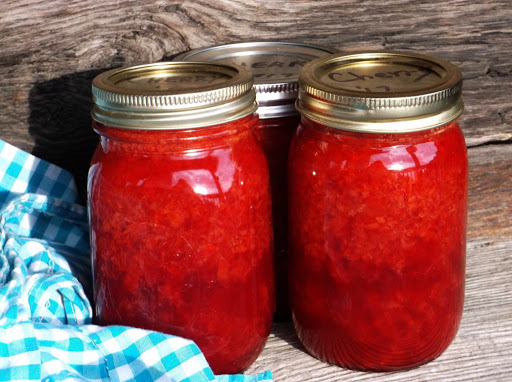
tart red cherry jam (less sugar)

This is my version of the Sure-Jell recipe that comes in that pink box of pectin. I've always found their directions a bit confusing, so I decided to do my own step-by-step directions. If you follow the instructions exactly, you'll have several ruby red jars of sweet and tart deliciousness to enjoy throughout the year, or to give as sweet gifts from your kitchen. Please note that prep time is approximate.
prep time
2 Hr 30 Min
cook time
20 Min
method
Canning/Preserving
yield
Makes 7 half pints or 3 pints and 1 half pint
Ingredients
- FOR THE JAM:
- 3 pounds fresh tart red cherries (about 1/2 gallon; enough to equal 5 cups, stemmed, pitted & chopped)
- 3 cups sugar, divided 2 3/4 cups & 1/4 cup
- 1 package sure-jell pectin for less or no sugar (pink box)
- 1/2 teaspoon butter (salted or unsalted)
- EQUIPMENT NEEDED:
- 2 medium or large mixing bowls for washing and pitting cherries
- 1 medium bowl for sugar
- 1 small bowl for combining sugar & pectin
- dry measure cups and 1/2 teaspoon measure
- 1 boiing water canner pot with rack
- 1 large deep stockpot for sterilizing jars
- 1 large non-stick dutch oven (about 6-8 qts.) for cooking jam
- 1 small pan for sterilizing lids
- 1 medium garbage bowl for stems and pits
- 1 long spoon for stirring jam
- lids, jars & rings (7 half pints or 3 pints & 1 half pint)
- 1 jar lifter
- 1 magnetic lid lifter or tongs
- 1 wide mouth jar funnel
- 1 soup ladle for filling jars
- 2 clean, dry dish towels
- 1 clean, damp dishcloth for wiping rims of jars
- 2 potholders
How To Make tart red cherry jam (less sugar)
-
 Step 1Start early in the day (I usually start right after breakfast.) Gather ingredients and equipment. Wash jars, lids and rings. Fill canning pot (with rack inserted,) with water to 2 inches below the top (typically should be the first ring on pot.) Place on large burner of stove (no heat yet.)
 -
Step 2Place jars, open end up, in large stockpot (not canner;) fill jars and stockpot with water. Cover pot with lid. Place on stove (no heat yet.) (See **NOTE.)
-
Step 3**NOTE: You may sterilize jars in dishwasher that has a sterilize option, just be sure that they are scalding hot when you fill them. Also, some folks sterilize their jars in the canner. I don't because I can never get that white mineral (lime) residue off of the inside of the canner. (Everyone has their own way of doing things, so if you do things differently, and it works for you, go for it!)
-
Step 4Place washed lids in small pan filled with water; place on small burner of stove (no heat yet.)
-
Step 5Set up remainder of equipment by placing one unfolded dish towel on a counter or table away from drafts. Place the other dish towel, unfolded, on counter nearest stove. On the towel, place jar lifter, lid lifter or tongs, jar funnel, rings, long handled spoon, soup ladle and clean, damp dish cloth ( keep dish cloth away from area of towel where jars will sit while filling because a cold wet spot could cause a jar to break.)
-
Step 6Wash cherries; place in one of the medium/large bowls. Place bowl on comfortable work surface along with remaining bowl and garbage bowl.
-
Step 7Remove stems and pit the cherries. For right-handed folks, place empty bowl to the left. Pick up a cherry, remove stem and discard; squeeze cherry between left forefinger and thumb, over the empty bowl; remove pit with right hand; drop cherry in empty bowl; discard pit. Repeat until half of the cherries are pitted.
-
Step 8Time to turn the heat on under the canner and the stockpot with the jars. Set heat to high. Keep an eye on them. When the pot with the jars comes to a full boil (it will usually take at least 20 minutes to come to a boil,) set timer for 10 minutes. Jars must be boiled for at least 10 minutes, then kept at a simmer until ready to fill with the jam. It will take quite a bit longer for the canner to come to a boil (be sure to have the lid on the canner.)
-
Step 9While waiting for the pots to boil, continue pitting the cherries.
-
Step 10When the timer goes off and the jars have boiled for 10 minutes, reduce heat to a simmer. Now turn heat on high under the small pan of water with the lids; when the water comes to a boil, lower heat to medium-low/low; allow lids to barely simmer until ready to place on filled jars.
-
Step 11When canner comes to a full boil, lower heat very slightly to avoid too much evaporation and lowering of water depth in canner. Boiling water may be added to the canner if it becomes too low. Filled and sealed jars must be covered by at least one to two inches while processing.
-
Step 12When cherries are all pitted, add to bowl of a food processor fitted with an S-blade (or a blender.) Pulse until finely chopped. You may need to do this in 2 or 3 batches.
-
Step 13Pour the chopped cherries into a bowl. Use a "dry measure" cup to measure 5 cups into the dutch oven.
-
Step 14Measure 3 level cups sugar into a medium bowl. From that bowl of sugar, measure out a level 1/4 cup of sugar and pour into a small bowl or cup. Add 1 package of Sure-Jell pectin for lower or no sugar recipes. Use a small spoon to mix well.
-
Step 15Add the small cup of sugar mixed with the pectin to the cherries in the dutch oven. Stir until well combined. Add 1/2 teaspoon butter.
-
Step 16Place bowl with remaining 2 3/4 cups sugar on counter within an arm's length of the stove. Make sure that dish cloth is still damp, but not dripping wet, and that all utensils are in place. It's showtime!
-
Step 17Place pot of cherries over high heat. Stirring constantly, bring to a full rolling boil that can't be stirred down. Immediately add sugar, continuing to stir constantly; bring back to full rolling boil that can't be stirred down. Set timer for one minute.
-
Step 18After boiling one minute, remove from heat. Use jar lifter to immediately remove (and drain) one jar. Set jar on dish cloth next to stove. Place funnel on jar. Ladle jam into jar, to 1/4 inch of rim. Remove funnel; place top side down on towel. Wipe rim of jar with damp cloth to remove any jam and ensure a proper seal.
-
Step 19Use lid lifter or tongs to remove a lid from the small pan; place lid on filled jar; place ring on jar and tighten. Work quickly to continue filling jars before jam cools too much.
-
Step 20Use potholder to remove lid from boiling canner; use jar lifter or tongs to carefully lift rack. Use jar lifter to place filled jars on rack. Carefully lower rack to bottom of the canner. Replace lid. When it begins to boil, set timer for 10 minutes.
-
Step 21After jars have processed 10 minutes, shut heat off and carefully lift rack. With a dry pot holder in one hand, lift jar and place on the pot holder in your hand and move to the dish towel away from drafts. Repeat with remaining jars, leaving a good space between jars. Jars will begin to make a popping sound as they seal. Let sit, undisturbed, for 24 hours, then gently press on each lid to check for a good seal. If the lid "gives," the seal is no good and the jar must be refrigerated.
-
Step 22Label jars, or use a permanent marker to write name of jam and date on lid. Store jars in a cool dark space, if possible. Refrigerate after opening.
- Last Step: Don't forget to share! Post a picture of your finished recipe here and on your favorite social network. Don't forget to tag Just A Pinch and include #justapinchrecipes!


Discover More
Tag:
#For Kids
Tag:
#Healthy
Diet:
Vegetarian
Diet:
Gluten-Free
Diet:
Low Fat
Diet:
Low Sodium
Diet:
Wheat Free
Diet:
Soy Free
Category:
Jams & Jellies
Keyword:
#homemade
Keyword:
#Farm Fresh
Keyword:
#gift-giving
Keyword:
#lower-sugar
Keyword:
#farmer's market
Keyword:
#sweet and tart
Keyword:
#george washington
Keyword:
#from the garden
Keyword:
#locally sourced
Keyword:
#hot water bath
Keyword:
#quick jam
Keyword:
#fresh cherries
Keyword:
#spring fruit
Ingredient:
Fruit
Culture:
American
Method:
Canning/Preserving
Comment & Reviews
ADVERTISEMENT
Just A Pinch Sweepstakes