ground chocolate cookie wafer base

This recipe is meant to replace the chocolate cookie base found in a lot of pie, and tart recipes. While there are a lot of chocolate wafer cookie recipes out there, these are not designed to be eaten like cookies (although I suppose you could), they are designed to be ground up, and used in baking recipes that call for a chocolate wafer base… Like Oreos. The thing that I like most about making my own is that I get to skip all the preservatives and other stuff that comes with store-bought cookies. Besides, when you grind out Oreos you get the creamy center, and that ruins it for me.
prep time
2 Hr 20 Min
cook time
15 Min
method
Bake
yield
Ingredients
- 1 1/2 cups all-purpose flour
- 3/4 cup cocoa powder, unsweetened
- 1 cup sugar, granulated variety
- 1/4 teaspoon salt, table variety
- 1/4 teaspoon baking soda
- 14 tablespoons sweet butter, unsalted, cut into small cubes
- 3 tablespoons milk, full fat
- 1 1/2 teaspoons vanilla extract
How To Make ground chocolate cookie wafer base
-
 Step 1Chef’s Note: If you want to add a hint of peppermint, add two drops of pure peppermint oil to the batter when mixing.
 -
Step 2Combine all the dry ingredients into the clean bowl of a food processor, fitted with an S-blade, and pulse a few times until thoroughly combined.
-
Step 3Sprinkle the butter cubes over the surface of the dry ingredients, and do about 10 pulses, of one second each, or until the butter is thoroughly combined.
-
Step 4Chef’s Note: In some recipes I freeze the butter, but not this one. After the butter is cut into small cubes, I usually return it to the refrigerator on a small tray. When I need it, I remove it from the fridge, and let it stand at room temperature for about 15 minutes before adding to the dry ingredients.
-
Step 5Combine the milk and vanilla extract in a small bowl, and with the food processor running at low speed, slowly add the liquid.
-
Step 6Continue to process until the mixture is thoroughly combined. It should resemble a thick, but pliable dough.
-
Step 7Remove from food processer, and kneed a few times just to make sure all the ingredients are thoroughly combined.
-
Step 8Form the dough into a log, about 2 inches thick. The thickness does not have to be precise, just get close.
-
Step 9Tightly wrap the log in cling foil, or wax paper, and place in the refrigerator for two hours.
-
Step 10Place a rack in the middle position, and preheat the oven to 350f (176c).
-
Step 11Remove the log from the refrigerator, and slice into 1/4-inch (.6mm) medallions.
-
Step 12Baking Tip: The cookies will expand during the baking process; so place them about 1 inch (2.5mm) apart.
-
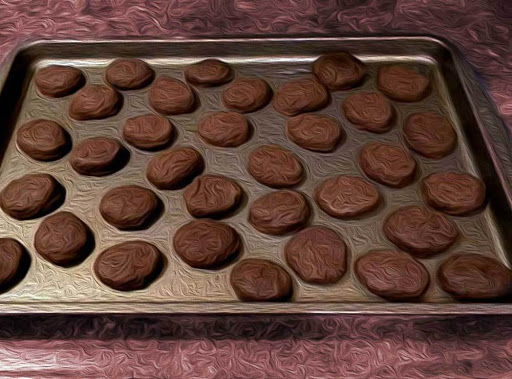
Step 13Bake in the preheated oven for 12 to 15 minutes; rotating the baking sheet back-to-front half way through the process.
-
Step 14Chef’s Note: While watching these cookies bake, they will puff up, and then collapse. I’ve noticed that they are usually done about a minute after they collapse.
-
Step 15Remove from oven, and place on a cooling rack.
-
Step 16Chef’s Note: The cookies will crisp as they cool. If they are still a bit moist, you need to cook them longer.
-
Step 17Chef’s Tip: Since all ovens are not created equal, it might be a good idea to do a few test cookies until you get the temperature and timing right.
-
Step 18Take the crisp cookie medallions and place them into the clean bowl of a food processor fitted with an S-Blade.
-
Step 19Use 1-second pulses until the medallions are ground into an even crumb. About 6 to 8 pulses should do the trick.
-
Step 20Chef’s Note: Don’t pulse too many times, or you’ll wind up with chocolate dust. Stop and check occasionally. As one of our teachers said: You can always add another pulse, but you can’t take one away.
-
Step 21Place the chocolate crumbs in a tightly sealed Ziploc bag, and place in the freezer until your recipe calls for them. They should store nicely for 4 to 6 months.
-
Step 22Chef's Note: In the near future, I will be posting some pie, and tart recipes that call for this kind of base… YUM !!!
-
Step 23Keep the faith, and keep cooking.
- Last Step: Don't forget to share! Post a picture of your finished recipe here and on your favorite social network. Don't forget to tag Just A Pinch and include #justapinchrecipes!


Discover More
Category:
Cakes
Category:
Pies
Category:
Other Desserts
Keyword:
#butter
Keyword:
#pies
Keyword:
#cocoa
Keyword:
#cakes
Keyword:
#sweets
Keyword:
#Vanilla
Keyword:
#tarts
Keyword:
#chocolate
Diet:
Soy Free
Method:
Bake
Culture:
American
Ingredient:
Spice/Herb/Seasoning
Comment & Reviews
ADVERTISEMENT
Just A Pinch Sweepstakes