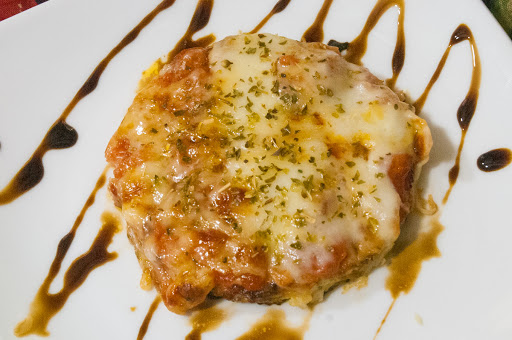
cauliflower crust pizza bites

Here’s an interesting twist on the normal bread crust pizza… use cauliflower in place of the bread dough. While the idea of a cauliflower pizza crust is not new; I didn’t like the recipes that I found. They tasted like cauliflower baked with eggs, and most were pretty bland. So, off to the test kitchen, and eight hours, and six attempts later, I came up with this one. It holds together quite well, and the flavor of the cauliflower compliments the toppings you choose to add. So, you ready… Let’s get into the kitchen.
prep time
20 Min
cook time
20 Min
method
Bake
yield
6 as appetizers
Ingredients
- 1 medium head organic cauliflower – about 1.5 pounds
- 1/2 teaspoon dried basil
- 1/2 teaspoon dried oregano
- 3 cloves fresh garlic minced, about 1 tablespoon
- crushed red pepper flakes, to taste
- 1/4 cup parmesan cheese, shredded
- 1/4 cup pecorino romano, shredded
- 1 pinch salt, kosher variety
- black pepper, freshly ground, to taste
- 1 medium egg
- pizza toppings, of your choice.
How To Make cauliflower crust pizza bites
-
 Step 1Place a pizza stone in the lower position, or use a baking sheet if you don't have a pizza stone, and then preheat oven to 450f (232c).
 -
Step 2Clean your cauliflower in the sink, and then dry as much as possible.
-
Step 3Cut the florets from the head, leaving as little of the stems as possible.
-
Step 4Chef’s Tip: Cauliflower stems are great in a lot of Autumn soups and stews, so you might want to reserve them for another use.
-
Step 5Add the florets to a food processor, fitted with an S-blade.
-
Step 6Give the florets about 6 to 8, 1-second bursts at high speed until you get what we call, cauliflower snow (finely chopped cauliflower).
-
Step 7Chef’s Note: You should have about 3 cups of cauliflower snow.
-
Step 8Chef’s Tip: We need to get rid as much of the moisture from the cauliflower as possible. So, use a steamer to steam the cauliflower for about 4 minutes.
-
Step 9Chef’s Note: I tried doing this in the microwave, but it changed the texture of the cauliflower in a way that I wasn’t happy with.
-
Step 10Place the steamed cauliflower in the center of a nice clean tea towel, and then squeeze until you get all the water out.
-
Step 11I got almost a quarter cup of water out of the cauliflower.
-
Step 12Chef’s Tip: Let the cauliflower cool a bit before doing the squeezing… unless you like third-degree burns.
-
Step 13Chef’s Note: I found that by squeezing out all that additional moisture, you will get a chewier crust. So, don’t skip this step.
-
Step 14Gather your ingredients.
-
Step 15Add the squeezed cauliflower to a bowl, and then add the cheeses, salt, basil, oregano, garlic, egg, and crushed red pepper. Add some freshly ground black pepper, to taste. Mix thoroughly.
-
Step 16Chef’s Note: The egg was a bit of a problem. Most recipes called for two eggs, but that left the final crust tasting like egg. I tried two yolks, but that wasn’t much better. I finally settled on one medium egg. That held the mixture together, without overpowering the crust with egg taste.
-
Step 17Make the crusts 3 inches in diameter, and I used a stacker press to achieve that goal.
-
Step 18Chef's Note: If you're not looking for appetizers, then this mixture should make one 12-14 inch pizza crust.
-
Step 19Add the crusts to a piece of parchment paper.
-
Step 20Chef’s Note: The thickness of the crust made a big difference. If I used 2 ounces of mixture to make the crust, it was too thick and overpowered the pizza. I tried 1 ounce but that didn’t give me enough crust to hold together. I found that if the pizza round is 3-inches in diameter, then 1.5 ounces is the best.
-
Step 21Chef’s Note: If you’re doing this by hand don’t make the crust any thicker than 1/4 inch.
-
Step 22Slide the parchment paper with the pizza crusts onto the hot pizza stone, or the baking sheet, and then cook for about 11 to 14 minutes.
-
Step 23Chef’s Tip: Don’t go by oven time… instead, take them out when they are starting to turn a nice golden brown.
-
Step 24They should look like this.
-
Step 25Add some sauce to the browned crust.
-
Step 26Chef's Tip: I found out (about the 4th try) that brushing the crusts with a bit of extra-virgin oil, really helped with the flavor.
-
Step 27Add some cheese, or any additional toppings.
-
Step 28Return to the oven and cook for 8 to 12 minutes, or until the cheese is bubbling and starting to brown. Enjoy.
-
Step 29Keep the faith, and keep cooking.
- Last Step: Don't forget to share! Post a picture of your finished recipe here and on your favorite social network. Don't forget to tag Just A Pinch and include #justapinchrecipes!


Discover More
Culture:
Italian
Category:
Other Main Dishes
Category:
Vegetable Appetizers
Tag:
#Quick & Easy
Tag:
#For Kids
Tag:
#Healthy
Diet:
Vegetarian
Diet:
Gluten-Free
Diet:
Low Fat
Diet:
Kosher
Diet:
Low Sodium
Diet:
Wheat Free
Diet:
Soy Free
Diet:
Low Carb
Keyword:
#cheese
Keyword:
#cauliflower
Keyword:
#Pizza
Keyword:
#Holidays
Keyword:
#appetizers
Keyword:
#crust
Keyword:
#bites
Keyword:
#Italian
Keyword:
#healthy
Keyword:
#vegetarian
Collection:
Meatless Mondays
Ingredient:
Vegetable
Method:
Bake
Comment & Reviews
ADVERTISEMENT
Just A Pinch Sweepstakes