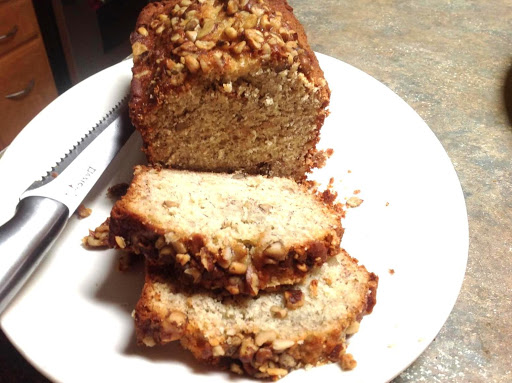
black walnut banana nut loaves

I purchased 2 pounds of over ripen Bananas for 80 cents and made dessert to feed two families, mine and my neighbor. This recipe is simple and can be made in just a few minutes. It bakes in less than an hour, and is great plain as is or with some softened butter spread on each slice. You can make it with or without the black walnuts or even use the nuts of your choice. I used 5 bananas in this recipe to give it the extra push in banana flavor, as well as a banana flavoring to enhance the flavor even more. Hope you try it. Add the extra nuts on top before baking for extra nutty flavor.
prep time
25 Min
cook time
45 Min
method
Bake
yield
Makes 2 loaves
Ingredients
- 1 cup olive oil, extra-virgin
- 2 cups sugar
- 4 cups self rising flour (i used white lily)
- 1 cup black walnuts, or other nuts of your choice
- 4 large eggs
- 1 teaspoon baking soda
- 2 tablespoons banana flavor
- 1/2 teaspoon salt
- 5 large ripe bananas, smashed
How To Make black walnut banana nut loaves
-
 Step 1Preheat oven to 350 degrees F. Spray 2 loaf pans with non stick cooking spray and set aside till needed. Peel bananas and smash into large chunky pieces, and set aside till needed.
 -
Step 2Coat the walnuts with 1 tablespoon flour and set aside. Coating the nuts with flour allows them to remain evenly distributed throughout the batter during baking.
-
Step 3Add the olive oil and sugar to a large bowl, and beat until completely blended together.
-
Step 4Add the eggs one at a time and beat well after each is added.
-
Step 5Add in the nuts and bananas & beat to blend into batter.
-
Step 6Add the baking soda to the flour, and stir to mix. Then add in about half of the flour, and beat till blended.Then repeat and beat again until throughly mixed.
-
Step 7Now add in the Banana flavoring and stir until blended.
-
Step 8Pour batter into the 2 prepared loaf pans, and top with extra nuts if desired. The toasted nut flavor is amazing after baking. Bake in preheated 350 degree F. oven for 40 to 45 minutes or until toothpick inserted into center comes out clean.
-
Step 9Cool then serve, if you can wait that long, or serve warm with softened butter on top. Enjoy!
- Last Step: Don't forget to share! Post a picture of your finished recipe here and on your favorite social network. Don't forget to tag Just A Pinch and include #justapinchrecipes!


Discover More
Comment & Reviews
ADVERTISEMENT
Just A Pinch Sweepstakes