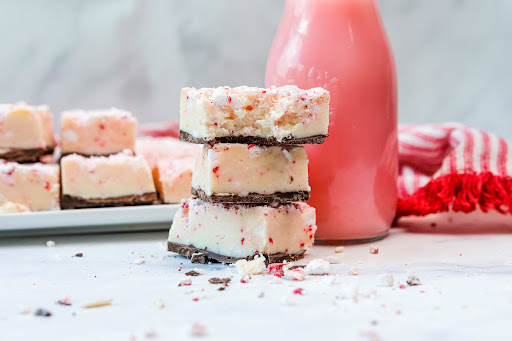
peppermint bark fudge

Tis the season! And with one of my favorite holidays just around the corner, my mom and I decided to make one of my favorite candies, Peppermint Bark. But instead of the traditional candy, we made it into a fudge. I hope you all enjoy and happy holidays!
Blue Ribbon Recipe
Homemade fudge is wonderful during the holidays. It is a nice addition to a dessert table, and it makes a delicious homemade gift. This rich and decadent peppermint bark version is fantastic. The fudge is so creamy, and the bottom hardens like a chocolate bar. Yum!
prep time
1 Hr 15 Min
cook time
15 Min
method
Stove Top
yield
30 +
Ingredients
- 1 box candy canes or peppermint swirl candies (about 7 ounces), unwrapped
- 3/4 - 1 packages chocolate almond bark
- 1/2 cup butter
- 3 cups granulated sugar
- 2/3 cup evaporated milk
- 1 teaspoon peppermint extract
- 7 ounces marshmallow cream
- 2 cups white chocolate chips
How To Make peppermint bark fudge
-
 Step 1Place candy canes or candies in a large ziptop bag and crush them into fine pieces with a rolling pin or meat tenderizer. You could also put them food processor. Don't leave them too large - they'd pose a choking hazard if someone didn't realize they were there.
 -
Step 2In a medium microwave-safe bowl, melt the chocolate almond bark in the microwave. Stir every 30 seconds to ensure the chocolate does not burn.
-
Step 3Line a 9x13-inch baking dish with enough wax paper to cover the entire bottom and sides. Pour the melted chocolate into the dish on top of the paper and smooth it out. Let sit about 5 minutes. Then place it in the freezer until you are ready to pour the fudge on top.
-
Step 4In a thick 6 quart or larger pot, place the butter, sugar, and evaporated milk.
-
Step 5Bring to a boil over medium-high heat. Once at a constant boil, reduce the heat to medium and continue to boil for 4 minutes. I do NOT use a candy thermometer, so I couldn't begin to tell you what temperature it should be. I can, however, tell you if you pull it before the 4 minutes is up it will not set properly and if you let it go longer than 4 minutes you'll burn the mixture. After your timer goes off pull the mixture off the heat right away.
-
Step 6Add the peppermint extract, marshmallow cream, and white chocolate chips.
-
Step 7Mix quickly. If you take too long, your marshmallow will not combine or the fudge will start to set.
-
Step 8Add half (or however much you wish) of the crushed peppermint candies. Mix thoroughly to ensure a good distribution throughout the fudge.
-
Step 9Pull the chocolate out of the freezer. Pour the peppermint fudge mixture on top of your chocolate.
-
Step 10Sprinkle with remaining peppermint candy bits. Let this sit for about 10 minutes then place it in the freezer for about 40 minutes.
-
Step 11Remove the fudge from the baking pan, pull the wax paper away from the fudge, and cut into 1-inch squares. You could go a little bigger, but the fudge is really rich. Place on a serving plate and enjoy! You can store cut pieces in a ziptop bag in the freezer for up to 3 months (probably longer but it doesn't last that long around here).
- Last Step: Don't forget to share! Post a picture of your finished recipe here and on your favorite social network. Don't forget to tag Just A Pinch and include #justapinchrecipes!


Discover More
Category:
Candies
Category:
Chocolate
Category:
Other Desserts
Tag:
#For Kids
Keyword:
#fudge
Keyword:
#sugar
Keyword:
#peppermint
Keyword:
#white-chocolate
Keyword:
#candy-canes
Keyword:
#candy
Keyword:
#Dessert
Keyword:
#chocolate
Keyword:
#peppermint bark
Keyword:
#Marshmallow cream
Keyword:
#peppermint disks
Collection:
The Candy Dish
Collection:
Gifts to Give
Culture:
American
Method:
Stove Top
Ingredient:
Sugar
Comment & Reviews
ADVERTISEMENT
Just A Pinch Sweepstakes