honey buns

Forget about cinnamon rolls! These delectable honey buns are the new, must-try breakfast pastry. This recipe yields an irresistible bun with the perfect balance of sweetness.
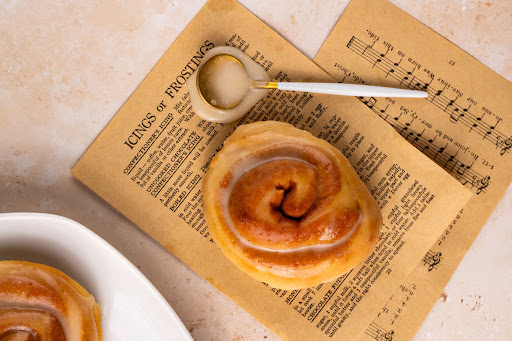
Blue Ribbon Recipe
This recipe yields honey buns that are soft, fluffy and filled with light, floral notes. They’re the perfect sweet treat to pair with your morning cup of coffee or tea. There are some differences between traditional cinnamon rolls and honey buns. Although both are delicious, the honey bun has a more well-developed consistency that is yeastier and more bread-like than cinnamon rolls. As well, cinnamon rolls typically have a more sugar forward filling that’s a combination of butter, brown sugar, and cinnamon where honey buns keep it simple with just a touch of cinnamon, allowing the naturally sweet honey to be the primary flavor component. Finally, cinnamon rolls are typically finished with an icing made with cream cheese, while honey buns use a glaze created with (you guessed it) honey.
Ingredients
- DOUGH
- 1/3 cup unsalted butter
- 1/3 cup milk
- 3 tablespoons honey
- 3/4 cup warm water (115 degrees F)
- 3 tablespoons sugar
- 3 1/2 teaspoons instant yeast
- 3 cups bread flour, plus more for dusting
- 1/2 teaspoon salt
- 1 egg, room temperature, whisked
- 1 1/2 teaspoons cinnamon
- GLAZE
- 3 tablespoons unsalted butter, melted
- 1 1/3 cups powdered sugar
- 2 tablespoons milk
- 2 teaspoons honey
- 1/2 teaspoon vanilla extract
- 1/4 teaspoon salt
How To Make honey buns
-
 Step 1To make the dough, add the butter to a small saucepan. Heat over medium-low heat until the butter has melted.
 -
Step 2Whisk in the milk.
-
Step 3Once the milk is incorporated, whisk in the honey. Remove from the heat and allow to cool to lukewarm. Transfer mixture to the bowl of a stand mixer.
-
Step 4Add the warm water, sugar, and yeast. Stir to mix thoroughly, then set to the side.
-
Step 5In a bowl, combine 2 cups of the bread flour and the salt.
-
Step 6Add the flour mixture to the yeast mixture.
-
Step 7Using the dough hook attachment, combine the ingredients for 1 minute on the lowest speed setting.
-
Step 8Add the egg and mix again on low.
-
Step 9With the mixer on, add 1/2 cup flour. After a minute or two, add the final 1/2 cup flour. Use a spatula to scrape down the sides, as needed. At this point, the dough should be less sticky. If it's still sticking to the sides of the bowl, add additional flour, 2 tablespoons at a time, until the dough has reached the desired consistency.
-
Step 10Allow the dough hook to work for two more minutes, then remove and place in a large warm, greased bowl. Cover the bowl with a tea towel or plastic wrap and place in a warm place to rise for 1 hour, or until it's doubled in size. Meanwhile, grease a 9x13" baking dish and set aside.
-
Step 11Transfer the risen dough to a lightly floured work surface and use a rolling pin to shape the dough into a 6x14" rectangle.
-
Step 12Sprinkle the cinnamon over the entirety of the dough and use your hands to lightly work it into the dough.
-
Step 13Carefully roll one long side of the dough to the other to create a log shape.
-
Step 14Dip your fingers in water and run them along the edge. Use your fingers to pinch it together to seal.
-
Step 15Use a sharp knife to cut the dough into 1" slices. Transfer to the prepared baking dish and cover with a tea towel.
-
Step 16Place in a warm place to rise for 30 minutes. Preheat the oven to 350 degrees F. After 30 minutes, carefully transfer the buns to a large baking sheet lined with parchment paper.
-
Step 17Bake 15-17 minutes until golden brown. Allow to cool 20 minutes before glazing.
-
Step 18To prepare the glaze, melt the butter in a microwave-safe bowl.
-
Step 19Sift in the powdered sugar.
-
Step 20Whisk as you pour in the milk, honey, and vanilla. Add the salt and mix again.
-
Step 21Invert each honey bun and dip the tops into the glaze.
-
Step 22Place glazed buns on a baking sheet to harden before storing or serve immediately. Enjoy!
- Last Step: Don't forget to share! Post a picture of your finished recipe here and on your favorite social network. Don't forget to tag Just A Pinch and include #justapinchrecipes!


