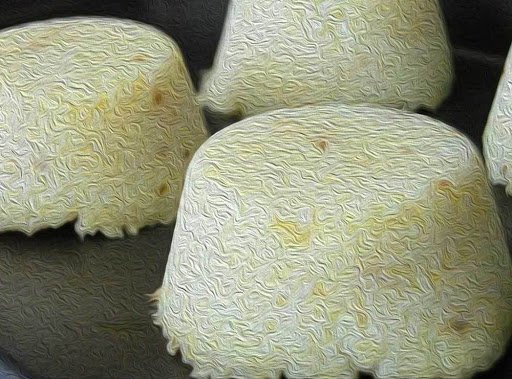
cheesy rice muffins

I’m a rice lover… I like white rice, yellow rice brown rice; you name it. Rice is, of course, an excellent side dish or, with a few additions, becomes a meal in and of itself. In this recipe, we’re going to go in a different direction, and turn rice into cheesy rice muffins, which can then be used as an elegant side to just about any meat, fish, or poultry dish. I usually bake these using stainless steel tower rings; however, since most people don’t have those, the use of a muffin pan makes for an excellent substitute, and provides a nice presentation.
prep time
cook time
35 Min
method
Bake
yield
10 - 12
Ingredients
- 3 cups long-grain white rice
- 6 cups filtered water
- 1 tablespoon salt, table variety
- 4 tablespoons sweet butter, unsalted
- 2 tablespoons shallots, finely chopped
- 1/2 cup carrots, small dice
- 1/4 cup peas, the frozen variety will do fine
- 1/4 cup celery, finely chopped
- /12 teaspoon freshly ground black pepper
- sea salt, to taste
- 3/4 cup of your favorite cheese (recommend: colby, cheddar, or pepper jack)
How To Make cheesy rice muffins
-
 Step 1Place the rice in a strainer, and rinse until the water runs clear.
 -
Step 2Add the water to a good-sized pot; add the tablespoon of table salt, and one tablespoon of the butter.
-
Step 3Bring to the boil, and then add the rice.
-
Step 4Allow the water to return to the boil, and then reduce the heat and simmer, covered, until the rice is just done, this should take from 15 to 20 minutes. Don’t overcook the rice.
-
Step 5When cooked, remove from the stove and, using a colander with a fine mesh screen, drain out any leftover liquid.
-
Step 6Place the rice in a bowl, and allow completely cool. Fluff the rice with a fork, and then cover the bowl with cling wrap, and place the bowl in the refrigerator overnight.
-
Step 7Chef’s Note: While refrigerating the rice is not an absolutely necessary, it does help with the overall taste and mouth feel of the finished dish.
-
Step 8If you have cooled the rice overnight, remove it from the refrigerator, and proceed with the remainder of the steps.
-
Step 9Place a rack in the middle position, and preheat the oven to 350f (176c).
-
Step 10In a large pot over medium heat, melt the remaining butter (3 Tablespoons), until the foam subsides.
-
Step 11Add the shallots, celery and carrots, and cook until the carrots are tender, about 4 to 6 minutes. Add the peas, and allow them to warm up in the butter mixture.
-
Step 12Remove the pot from the heat, and add the rice , and the cheese.
-
Step 13Carefully fold the ingredients together until fully mixed.
-
Step 14Lightly oil the cups of a large size muffin tin.
-
Step 15Chef’s Note: These rice muffins are very delicate, so it’s important to make sure the muffin cups are thoroughly lubricated. A cooking spray is a good choice in this respect.
-
Step 16Fill each one of the cups with the rice mixture, about 3/4 full. Depending on how much you fill the cups, you should have enough mixture for 10 to 12 rice muffins. So, if you don't want that many, or you don't plan to freeze them, just cut the recipe in half.
-
Step 17Smooth down the tops, but don’t press the mixture into the cups too hard.
-
Step 18Place in the preheated oven, and cook until the tops are golden brown, about 25 to 35 minutes.
-
Step 19Allow to cool slightly before, carefully removing them from the muffin tin.
-
Step 20Chef’s Tip: I typically slide a knife around the outsides of the rice, and then invert them onto a plate.
-
Step 21Chef’s Tip: There are a lot of instances where I find myself sliding a knife around something to loosen it before removing. Unless you’re really tender with that knife, you are going to wind up scratching all your nice bakeware. So, I went to my local fast-food joint, and picked up a few of their cheap-o plastic knifes, and solved the problem.
-
Step 22Serving Tip: I like to put one of these rice muffins on a plate, and then add a few slices of roast beef. It make for a wonderful presentation.
-
Step 23Presentation Tip: Another way to make these really special, is to cut some squares of brown baking paper, slightly larger than the muffin tin cups, then press them into the cups with the bottom of a glass, and then fill the paper cups with the mixture. It makes for a beautiful presentation.
-
Step 24Keep the faith, and keep cooking.
- Last Step: Don't forget to share! Post a picture of your finished recipe here and on your favorite social network. Don't forget to tag Just A Pinch and include #justapinchrecipes!


Discover More
Category:
Other Main Dishes
Category:
Rice Sides
Keyword:
#rice
Keyword:
#cheese
Keyword:
#peas
Keyword:
#Carrots
Keyword:
#muffin pan
Ingredient:
Rice/Grains
Diet:
Wheat Free
Method:
Bake
Culture:
American
Comment & Reviews
ADVERTISEMENT
Just A Pinch Sweepstakes