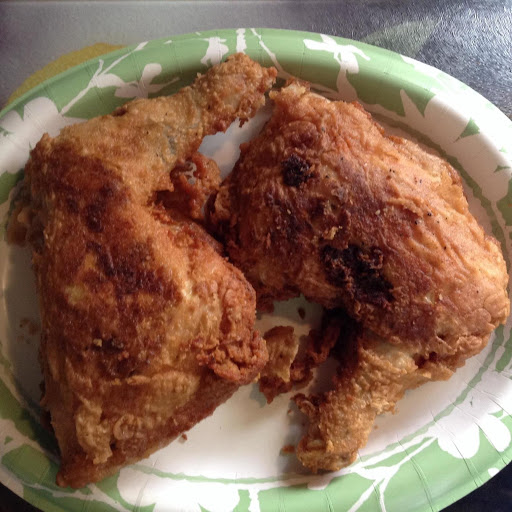
patty's fried chicken

My family and friends love this fried chicken. It is crunchy and delicious. Seldom is there any left. Don't let the length of the directions scare you. I have tried to be very thorough for those who have never fried chicken or are new to it. Those of you, like me, who have fried a few hundred chickens (or more) are going to look at the directions and know that you already do that. Enjoy!
prep time
cook time
30 Min
method
Pan Fry
yield
8 pieces
Ingredients
- 8 chicken pieces
- BRINE:
- 1 tablespoon salt
- water, to cover
- SEASONING FLOUR:
- 1 1/2 cups self rising flour, save any remaining seasoning flour
- 1 1/4 teaspoons salt
- 1 1/4 teaspoons pepper
- 1 teaspoon garlic powder, optional
- peanut or vegetable oil for frying
- GRAVY:
- 3 cups milk, divided
- 1/3 cup flour, slightly heaped
- 6 tablespoons oil that chicken has fried in
- all the browned bits left in skillet
- salt and pepper, to taste
How To Make patty's fried chicken
-
Step 1The night before you plan to fry chicken, place chicken pieces in large container, sprinkle 1 tablespoon salt over the chicken and cover with water. Cover container with its lid or plastic wrap. Refrigerate overnight.
-
Step 2Remove chicken from refrigerator 45 minutes to 1 hour before ready to fry chicken, but do not drain brine from it (this helps to bring the chicken to room temperature and won't drop the temperature of the oil when chicken added). Put flour, salt, pepper, garlic powder (if I am going to be making gravy, I usually omit the garlic powder, but by all means use it if you want) in a one gallon zip-lock bag. Zip bag closed and turn the bag upside down a few times to mix content of bag.
-
Step 3Using a large skillet, pour in 1/2-inch oil (may use a little more if you want). Heat oil on medium heat till hot (approximately 325-330 degrees if you use a thermometer).
-
Step 4While oil is heating, tear a piece of wax paper and place on counter top. Remove chicken piece from the brine, but to not shake or rinse off. Place directly in the zip-lock bag. Dredge chicken in seasoning flour in zip-lock bag and place coated chicken on waxed paper. I usually do the legs and wings two at a time and the thighs and breasts just one at a time (if you do to many at a time, they will knock against each other and knock the coating off).
-
Step 5If you are going to be frying multiple batches of chicken or need to keep your chicken warm, turn your oven on to the warm setting, or its lowest setting. Line a large cookie sheet with aluminum foil and set a rack on top of the foil. As the chicken is fried, place the chicken on the rack and keep warm in the oven.
-
Step 6When oil is hot, place chicken pieces in the skillet (skin side down) being careful not to crowd chicken. Cover skillet with lid and fry for approximately 15 minutes (check the chicken half way through cooking time, but do not turn chicken, to make sure the oil is not to hot...if it is turn the heat down a little).
-
Step 7After 15 minutes turn the chicken over, replace the lid, and cook for another 15 minutes. Remove the lid and turn the chicken one last time. Do NOT replace the lid. Fry for 3 more minutes to crisp up chicken. Chicken is done if juices run clear.
-
Step 8TO MAKE GRAVY: Drain all but approximately 6 tablespoons of oil from the skillet, being careful to retain all the browned bits in the skillet.
-
Step 9Pour 1 1/2 cups of milk in the skillet to deglaze it. Keep heat on medium and stir (I use a whisk) until milk is heated and there are no remaining browned bits left stuck to the sides or bottom.
-
Step 10Place remaining 1 1/2 cups milk and slightly heaped 1/3 cup of the remaining seasoning flour into a jar or other container with a lid. Shake thoroughly until milk and flour are incorporated. Slowly pour into the heated milk in the skillet, whisking it at the same time. When all has been added, continue whisking till it has thickened and reached a low boil. Taste and add more salt and pepper if needed. If to thick, whisk in a little milk, if you want thicker add a little more flour and milk.
-
Step 11Serve on mashed potatoes (or a slice of bread or broken open biscuit) and enjoy!
- Last Step: Don't forget to share! Post a picture of your finished recipe here and on your favorite social network. Don't forget to tag Just A Pinch and include #justapinchrecipes!
Discover More
Comment & Reviews
ADVERTISEMENT
Just A Pinch Sweepstakes