cheesy garlic stuffed chicken

Everyone I have made this for absolutely loves it! So many flavors and just the right amount of juiciness for this chicken dish. Rolling the chicken in butter keeps the chicken so juicy, I always pour a little more on top of the breaded chicken right before it goes in the oven. If you don't like the bottom getting soggy, put this on a rack or only bread the top before baking. There are so many ways to change up the flavor of this to suit your own palette. Enjoy!
Blue Ribbon Recipe
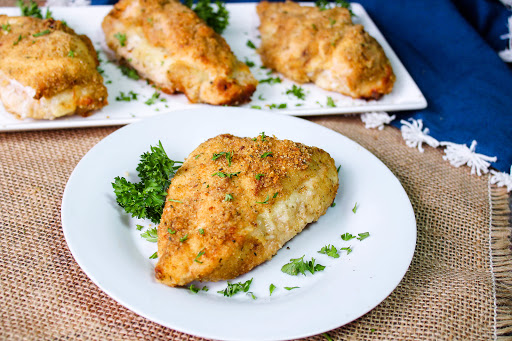
Even picky eaters are going to love this stuffed chicken recipe. The combination of cheese is very savory and flavorful. There's just enough fresh garlic to add a pop of flavor but not be overpowering. Rolling the chicken in melted butter, then coating with bread crumbs, crisps up when baked, and helps to keep the chicken breasts juicy. This will be a big hit with your family.
Ingredients
- 8 large, thick chicken breasts (boneless/skinless)
- chopped garlic, to taste
- 1 cup shredded mozzarella cheese
- 1 cup shredded Parmesan cheese
- 2 cups Italian seasoned bread crumbs
- 1/2 cup butter, melted (I like to use salted butter)
- toothpicks or short skewers
- sweet basil, to taste (I added this for a little extra flavor)
How To Make cheesy garlic stuffed chicken
-
 Step 1Butterfly fillet the chicken breasts and lay flat in order to stuff them. (http://www.youtube.com/watch?v=PBSAEHnFaO4)
 -
Step 2Stuff inside with both cheese's on the breast.
-
Step 3Then add garlic.
-
Step 4Sprinkle with sweet basil before closing up and securing with toothpicks or short skewers. (Make sure you have secured the opening because the next step is to roll in butter and bread crumbs.)
-
Step 5Melt the butter in a flat dish with sides so you can still roll the chicken in it.
-
Step 6Then roll in bread crumbs.
-
Step 7Place them in a baking dish or pan.
-
Step 8Pour remaining butter, or melt a little more, over the chicken.
-
Step 9Bake at 350 degrees for about an hour.
-
Step 10Make sure to pull out all the toothpicks or skewers before serving. (I like to use the short skewers because they don't get in the way and they are easier to take out once the chicken is ready.)
- Last Step: Don't forget to share! Post a picture of your finished recipe here and on your favorite social network. Don't forget to tag Just A Pinch and include #justapinchrecipes!


