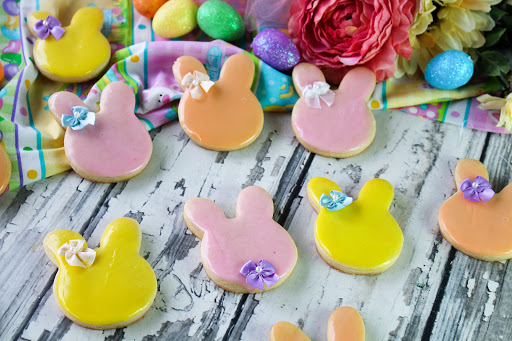
ole fashioned iced easter bunny cookies

They are great for all sorts of holidays, birthday, bridal showers anything really. I started making them like this years ago with the little bows and everyone goes crazy over them… simple yet so, so cute. Angie's Southern Kitchen Blog http://www.angiessouthernkitchen.com/
Blue Ribbon Recipe
Not only is this a yummy Easter cookie, but it's also adorable! We loved placing bows on the cookies so we could turn the bunnies into boys and girls. The cookie itself is a simple, buttery sugar cookie. The dough is easy to work with and we took Angie's advice to cut them a little thicker. They were nice and chewy. The cookies didn't spread much and held their shape while baking. The cookie's not overly sweet, so the glaze not only makes them pretty it adds just the right amount of sweetness.
Ingredients
- FOR COOKIES
- 2 sticks butter
- 1 1/4 cups sugar
- 1 teaspoon salt
- 1 1/2 teaspoons baking powder
- 2 teaspoons vanilla
- 1 large egg
- 1/4 cup heavy cream
- 3 tablespoons corn starch
- 3 cups all-purpose unbleached flour
- FOR ICING
- 2 1/4 cups confectioners' sugar, sifted
- 2 tablespoons light corn syrup
- 3 tablespoons whole milk
- food color, I use powder or gel
How To Make ole fashioned iced easter bunny cookies
-
 Step 1In a standing mixer cream butter, sugar, salt, and baking powder until light and fluffy.
 -
Step 2Add vanilla and egg. Beat well until blended.
-
Step 3Combine the cornstarch and flour. Add half the flour and cream mix in. Then the rest of the cream and the cornstarch/flour.
-
Step 4Mix until well incorporated.
-
Step 5Divide into 2 round disk wrap and put in the refrigerator for 30 minutes.
-
Step 6Heat oven to 350. Roll dough out on a floured surface. I roll the cookies rather thick. I like them about 1/8 inch thick.
-
Step 7Cut out cookies with cookie cutter and place on a parchment-lined baking sheet.
-
Step 8Bake cookies for 10-14 minutes.
-
Step 9Let cookies cool completely on a wire rack before icing.
-
Step 10To make the icing, in a large flat bowl mix ingredients until all the lumps are gone and well mixed. I let this sit a while to let the bubbles work their way to the top otherwise you tend to get lots of bubbles in your icing later (like 10 minutes).
-
Step 11Add food coloring to tint icing as desired. Make sure your bowl is large enough to dip your cookie in.
-
Step 12Dip cookie. Let it drain allowing excess to drip into icing bowl. I then place on a rack on a cookie sheet to cut down on the mess. I let these dry for at least one day otherwise they will stick to one another.
-
Step 13I make my own little bows out of a cute ribbon. I make ahead of time so they are ready to stick on. Or, you can purchase them at any craft store. I place any bows or candies on the cookies while they are just iced so they stick and stay on. These cookies bag well and look great for party favors.
- Last Step: Don't forget to share! Post a picture of your finished recipe here and on your favorite social network. Don't forget to tag Just A Pinch and include #justapinchrecipes!


