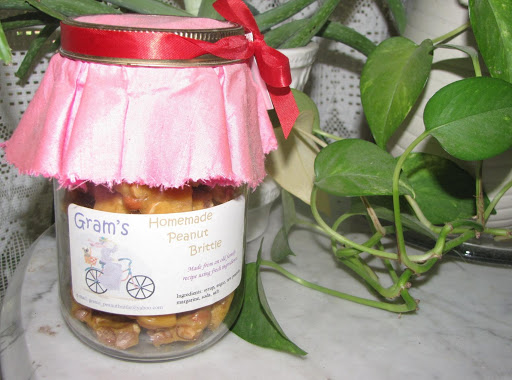
gram's peanut brittle

My mother, Lucille, was very well known for her peanut brittle in this hill country area and she sold it to the tourist and retailer’s, including stores, gift shops, restaurants, and camps. She would fill quart jars with that crunchy goodness and put a cloth on the lid and tie on ribbon or raffia. I designed and made labels for her with a really cute logo I found on the internet. My mom first learned to make brittle as a child, cooking it on a wood burning stove, and in her later years she used the microwave. In her honor I will carry on the tradition and pass it on to future family members.
prep time
5 Min
cook time
10 Min
method
Microwave
yield
1 pound
Ingredients
- I REALIZE THAT THIS RECIPE IS COMMON HERE AT JAP, HOWEVER, MY MOM IS KNOWN FOR HER BRITTLE SO I AM POSTING HER RECIPE FOR BRITTLE TO INCLUDE IN OUR FAMILY COOKBOOK.
- 1 cup peanuts, raw spanish
- 1 cup sugar
- 1/2 cup corn syrup, light
- 1 tablespoon butter, unsalted
- 1 teaspoon vanilla
- 1 teaspoon baking soda
- butter to coat cookie sheet
- I HOPE THAT ALL OF THESE STEPS WILL HELP IN BEING SUCCESSFUL IN MAKING THIS CANDY.
How To Make gram's peanut brittle
-
 Step 1Measure all ingredients and have them in separate containers. You will need a microwavable 2 quart container preferably with a handle. I use a 2 quart glass measuring bowl with a handle. You will also need a wooden spoon.
 -
Step 2Mix syrup and sugar in the 2-quart container.
-
Step 3Microwave the mixture for 3 minutes and 30 seconds. The syrup will be bubbly.
-
Step 4Remove bowl from microwave and add the peanuts and quickly stir.
-
Step 5Return the container to the microwave and set timer for 4 minutes and 30 seconds.
-
Step 6When timer sounds, check to see if the syrup has started to turn gold and if not continue to microwave at 15 second intervals until it begins to turn a deep gold. It usually does not take more than 5 minutes.
-
Step 7Remove from microwave and add the butter, vanilla and baking soda and stir incorporating everything well.
-
Step 8The mixture will begin to foam.
-
Step 9Quickly pour mixture onto a well buttered cookie sheet or buttered foil lined cookie sheet or onto a Silpat. I prefer using a Silpat as the brittle comes away from the Silpat very easily.
-
Step 10Spread the brittle with the back of a wooden spoon until it is about ¼ inch thick.
-
Step 11Move to a rack to further cool.
-
Step 12When brittle has cooled some and begins to harden remove brittle from pan or Silpat and place on rack to cool completely.
-
Step 13When the brittle has fully cooled I put it upside down on a cookie sheet and tap it in various places with the wooden handle of a heavy knife to break it a part. Place the brittle into plastic bags or containers to keep fresh.
-
Step 14Note: The following photos will help you to see what a perfect brittle color should be before it is poured. Notice how the syrup is still clear. This color is not gold enough.
-
Step 15This color is almost there but not quite gold enough.
-
Step 16This color is perfect. CAUTION: Anything darker than this and it will burn.
- Last Step: Don't forget to share! Post a picture of your finished recipe here and on your favorite social network. Don't forget to tag Just A Pinch and include #justapinchrecipes!


Comment & Reviews
ADVERTISEMENT
Just A Pinch Sweepstakes