condiment essentials: worth the wait hot sauce

I love a good hot sauce; however, I do not want my sauce to be so hot that it blows the top of my head off, and sets my hair on fire. This sauce is similar to Frank’s hot sauce but with more body… So, you ready… Let’s get into the kitchen.
►
yield
serving(s)
prep time
15 Min
method
No-Cook or Other
Ingredients For condiment essentials: worth the wait hot sauce
- PLAN/PURCHASE
-
1 lbfresh chilies, more on this later
-
2 Tbspsalt, kosher variety
-
2 Tbspwhite sugar, granulated variety
-
rice wine vinegar, as needed
How To Make condiment essentials: worth the wait hot sauce
-
 1PREP/PREPARE
 -
2Since you are working with chilies, you should use gloves. Trust me… you need to use gloves.
-
3You will need a good blender for the recipe. My favorite blender for this type of job would be the Vitamix… it is amazing.
-
4Chilies come in all shapes, and sizes, and from mild to hot. You could use any variety you wish; however, I think the best chili for this hot sauce is called a Fresno Chili. Mild… not too hot, and perfect to give this hot sauce an amazing depth of flavor.
-
5Gather your ingredients (mise en place).
-
6Measure your chilies until you get approximately 1 pound (0.5kg).
-
7Remove the tips and the stems.
-
8Remove the seeds and veins.
-
9Chef’s Note: After removing the tips, stems, seeds, and veins, you should be left with about 10 ounces (285g) of chilies.
-
10Fine chop the chilies with a knife, or use a food processor, fitted with an S-blade.
-
11Add the chili’s; along with the salt and sugar, to a large, non-reactive bowl.
-
12Using your gloved hand, massage the mixture until the chilies become mushy, and release their liquid, about 10 – 15 minutes.
-
13Add the mixture to a mason jar, or other glass container, cover the top with a double layer of cheesecloth, then sit it in a dark corner of your kitchen, and let it ferment for 8 – 10 days.
-
14Chef’s Note: If you are not using a mason jar, then use rubber bands to secure the cheesecloth to the top of the jar.
-
15After 8 – 10 days, add the fermented chilies to a good blender, and blend until smooth.
-
16Now, add the vinegar, a tablespoon at a time, until you like what you taste. In my case, it was two tablespoons of vinegar.
-
17PLATE/PRESENT
-
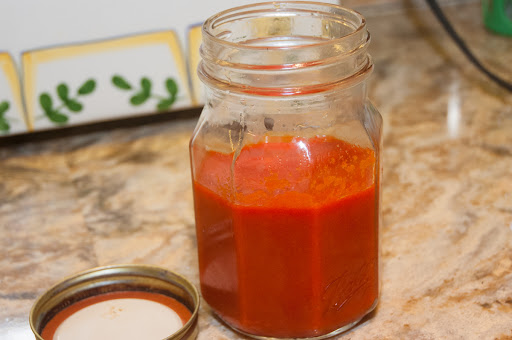
18Place in a non-reactive container, and refrigerate until needed. Use as you would any good hot sauce. Enjoy.
-
19Keep the faith, and keep cooking.
- Last Step: Don't forget to share! Make all your friends drool by posting a picture of your finished recipe on your favorite social network. And don't forget to tag Just A Pinch and include #justapinchrecipes so we can see it too!


Categories & Tags for Condiment Essentials: Worth the Wait Hot Sauce:
ADVERTISEMENT
ADVERTISEMENT