rhuberry pie
(8 ratings)
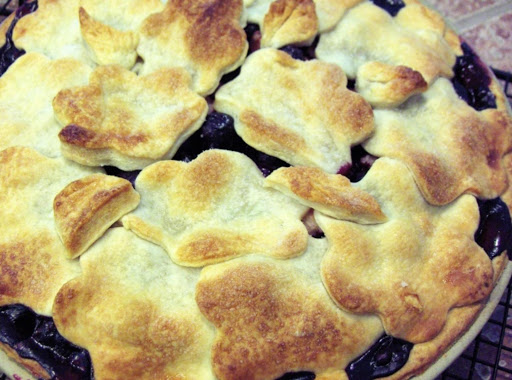

This is a delicious blend of two of my favorite summer fruits, blueberries and rhubarb! You can make your crust extra pretty if you use small cookie cutters to cut the second pie crust into shapes, and lay them across the top of the pie. This recipe was originally found in an OLD Pillsbury cookbook I own, but I have fiddled w/ the ingredients a bit, and made it "my own". Photos are mine.
Blue Ribbon Recipe
The tartness of the rhubarb is perfectly offset by the delicate sweetness of the blueberries. Sigh.... this recipe is just plain GOOD!
— The Test Kitchen
@kitchencrew
►
(8 ratings)
yield
8 serving(s)
prep time
20 Min
cook time
45 Min
method
Bake
Ingredients For rhuberry pie
-
1 box[15-oz] pre-made, refrigerator pie crusts
- PIE FILLING INGREDS:
-
2 1/2 ccut up [fresh or frozen] rhubarb
-
2 1/2 cfresh blueberries
-
1 tsplemon juice, fresh
-
3/4 csugar
-
1/4 call-purpose flour
-
1 Tbsptapioca, for thickener
-
1 pinchground nutmeg
-
1 dashsalt
- USE THIS FOR GLAZING PIE CRUST:
-
1 Tbspmilk
-
1 Tbspcoarse sugar, if desired
How To Make rhuberry pie
-
 1Bring pie crusts to room temp, as directed on package. When crusts are at room temp, handling them the way the box instructions tell you, put one of them into a 9" pie plate. (If you prefer to make a home-made crust for a two-crust pie, that's great! Go for it! ha!) Preheat oven to 400°.
 -
2In a large bowl, toss the fruit w/ the lemon juice, to coat.
-
3Mix in all other filling ingredients. Toss filling ingreds. gently, to mix.
-
4Spoon into crust-lined pie plate.
-
5Cut up the second crust into small rectangles, about 2" x 1-1/2" in size. [Hint: use a pizza cutter to do this; makes it really easy!] Lay these small rectangles across the pie filling, alternating rows, leaving about an inch between squares [to look like a checkerboard pattern]. Corners of the crust pieces should touch, from row to row. Take remaining pieces and line the edge of the pie crust with them, overlapping, if necessary. (See JAP's version of the checkerboard top in their photo, above). TIP: use a small cookie cutter instead of cutting 2nd crust into rectangles. Lay cookie cutter shapes on top of filling for a creative look! I use my heart- or star- or flower-shaped bread tubes as cutters; the shapes look great on top of pies! I used the flower-shaped bread tube in the main recipe photo).
-
6Brush the crust with the milk, using a soft pastry brush. Friends from where I used to live in New England call this "washing its face!" Sprinkle the coarse sugar onto the milky crust.
-
7Cover the crust edge with foil, to prevent excessive browning HINT: instead of using several thin strips of foil around edges, and fighting w/them to stay on, try this ... tear off a square of foil, and cut a circle out of the middle, leaving a "frame" of about 2" to cover the outer edge of the pie. Remove foil during the last 15 - 20 minutes of baking time.
-
8Bake for approx 45 - 50 minutes, or until the filling is bubbly in the middle and the crust is a pretty golden brown. PROTECT YOUR OVEN by putting pie onto a cookie sheet before putting in the oven. If it boils over, you'll have a real red/purple mess! Cool to room temp before serving.
- Last Step: Don't forget to share! Make all your friends drool by posting a picture of your finished recipe on your favorite social network. And don't forget to tag Just A Pinch and include #justapinchrecipes so we can see it too!


Categories & Tags for Rhuberry Pie:
ADVERTISEMENT
ADVERTISEMENT