bonnie's basic bread recipe
(8 ratings)

This is my basic bread recipe. I have tweaked it until it has a tender, pliable center, light and nice texture, not dense, and has a beautiful golden brown crust. It is a delicious bread, and makes good sandwiches and toast. The same recipe makes scrumptious sweet rolls and Baker's Squares which are posted.
►
(8 ratings)
yield
serving(s)
prep time
3 Hr
cook time
3 Hr
method
Bake
Ingredients For bonnie's basic bread recipe
-
please read the directions before you start. assemble all the ingredients beforehand. do not make any substitutions. make recipe exactly as written.
-
```````````````````````````
-
3/4ounce of active dry yeast
-
2tablespoons sugar
-
1cup milk
-
1cup water
-
1tablespoon water
-
8cups bread flour
-
1egg, beaten
-
1tablespoon butter
How To Make bonnie's basic bread recipe
-
1When making bread, technique is as important as the ingredients. This is a slow fermentation bread recipe, and it is important not to skip the long rising time as it is necessary to the lightness nad the soft texture of the bread.
-
2I use a Kitchen Aid mixer with a dough hook. It makes life easier. However, you may knead the dough by hand if you want to do so.
-
3In a small saucepan add 1 cup of warm water, and 1 cup of milk and 1 tablespoon of real butter, heat until a thermometer registers 110 degrees and transfer the contents to the stainless steel mixing bowl. Add the yeast and sugar, then whisk well. Set aside to work.
-
4Measure your flour. (I don't use the entire 8 cups) It is best not to have the dough too dry -- or too wet. Leave out about a cup of the flour and set it aside. Mix the one tablespoon of salt with the 7 cups of flour in a large mixing bowl and mix very well to incorporate air into it.
-
5Put the stainless steel bowl with the yeast mixture on the stand and turn it on medium. Add the beaten egg. Add the flour 1/2 cup at a time until it is a thick smooth batter with no lumps. Turn the mixer on low, and add flour, a little at a time to make a soft dough, once the dough begins to pull away from the sides of the mixer and it cleans the walls of the bowl, then start a timer to knead for 8 minutes, gradually adding just enough flour to allow the dough to become elastic, smooth as a baby's butt, and is not sticking to the walls of the mixing bowl or the bottom of the bowl. After 8 minutes have passed, turn the bread dough out onto a lightly floured board and shape into a ball. It should neither be sticky nor should it be hard, but should be very pliable. Put the ball in a greased deep stainless steel bowl to rise, mound side down and turn so greased top is facing up and cover and sit it on the counter. You want it to rise without warmth but not in temperature under 68 degrees. It will take about 3 hours to rise and that is what you want for the lightest bread with soft texture.
-
6After the dough has risen, turn it out onto a lightly floured board and press out all the gases. If you are making two loaves of bread, you need to grease two loaf pans. Divide the dough--cover it and let it rest a few minutes.
-
7Next, shape the loaves. To make a loaf, stretch the dough into a rough rectangle, the long sides the length of the baking pan. Roll the dough up fairly tight and tuck the end under and place the dough in the pan seam side down. This will allow the bread to have a uniform shape when baked.
-
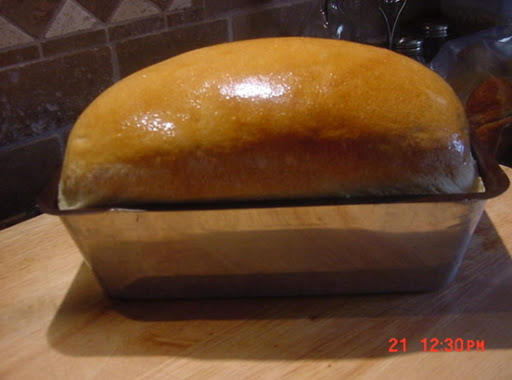
8Now cover your loaves with a lint free towel and let them rise again. This should take about 1 1/2 hours or so for the bread to look as high as it does in my photo. Place a small pan of water on the bottom rack of the oven, and push to the left side. This allows moisture for the bread.
-
9Pre-heat the oven to 375 degrees and bake the loaves around 30 minutes. Make sure the bread doesn't get too brown. Lay a piece of tin foil on the top of the bread if it does brown too quickly.
-
10Your bread is done when it looks like my photo and is hollow when you tap on it. Brush butter on the tops while it is hot if you like a shinier, softer crust. Let the bread cool on a rack for five minutes, then remove the pan and continue to cool. When bread is cool, slice into slices and store in zip lock bags in the refrigerator or freeze and take one slice a time as needed. Remember, your bread doesn't have preservatives so you need to use it right away.
-
11Cook's Tip: This bread recipe makes 2 loaves of bread or rolls, or you can make a bread braid, or some luscious sweet rolls dripping with real butter, or Baker's Squares. Home made breads do not contain preservatives. So you will need to slice your bread when it is cool. I put mine sliced and ready to use in zip lock bags. Take out a couple of slices and microwave 10 seconds on one side, turn over and microwave another 10 seconds and it will be ready for a sandwich. Enjoy!
- Last Step: Don't forget to share! Make all your friends drool by posting a picture of your finished recipe on your favorite social network. And don't forget to tag Just A Pinch and include #justapinchrecipes so we can see it too!
Categories & Tags for BONNIE'S BASIC BREAD RECIPE:
ADVERTISEMENT
ADVERTISEMENT